Repackaging a Windows Installer (.msi) Package
AdminStudio 2025 | 29.0 | Repackager
While it is not recommended that you repackage a Windows Installer (.msi) package, it sometimes may be necessary to repackage a Windows Installer package in order to convert it to a virtual package (perhaps due to the use of custom actions or other features that are not supported in application virtualization).
To repackage a Windows Installer (.msi) package, perform the following steps:
To repackage a Windows Installer package:
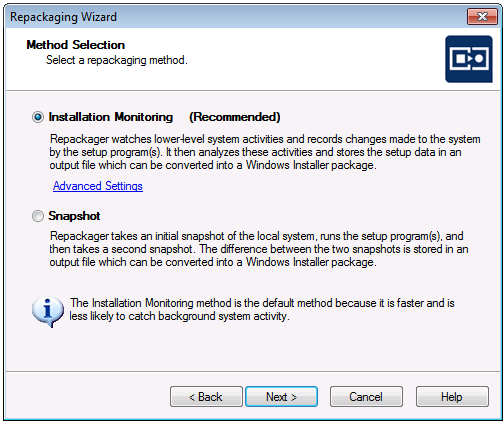
- From the Repackager interface, launch the Repackaging Wizard by clicking on the link or by selecting Repackaging Wizard from the Tools menu. The Welcome Panel opens.
- Click Next. The Set Target Project Information and Capture Settings Panel opens.
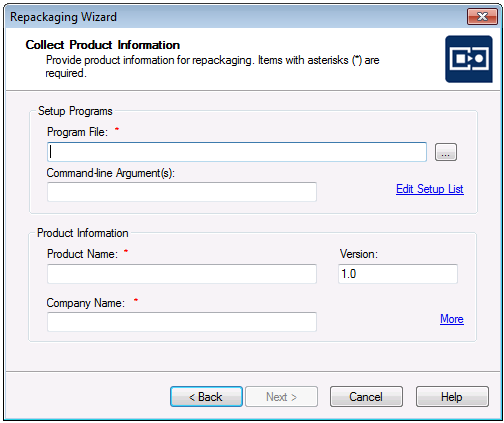
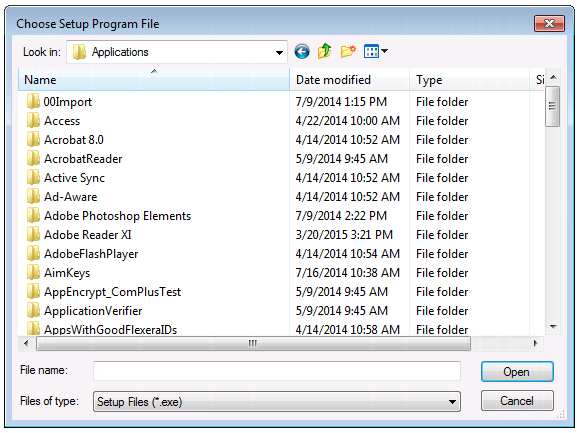
- Click the Browse (
 ) button next to the Program File field to open the Choose Setup Program File dialog box.

| Field | Entry |
|---|---|
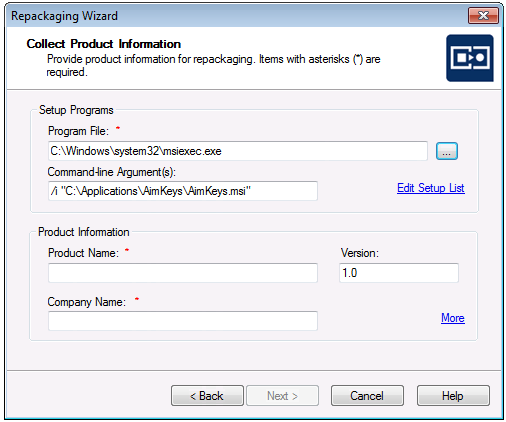
| Program File | C:\WINDOWS\system32\msiexec.exe |
| Command line Argument(s) | /i "C:\DIRECTORYPATH\PACKAGENAME.msi" |
Do not edit the entries in the Program File or Command line Argument(s) fields.
- In the Product Information area, make entries in the Product Name , Version , and Company Name fields.

-
The output folder created by the repackager will have access allowed to the Administrators group and the current logged-in user only.

- You can also enter the name of a new folder in the Project path to store files field, and you will be prompted to create it when you exit this panel.
-
When browsing to a folder that is accessible only to the Administrators group and the currently logged-in user, the system will proceed with the repackaging process. Make sure that the folder has the appropriate permissions set to avoid access issues during repackaging.
- To begin the repackaging process, click Start on the Set Target Project Information and Capture Settings Panel. The Repackaging Panel opens and the Repackaging Wizard captures the initial system status. Then, the selected setup program will be launched.
- Follow the prompts until the installation has completed. When the installation is complete, you are prompted to make any additional changes to the system (such as deleting files and shortcuts) that you want to be recorded in this repackaged installation.
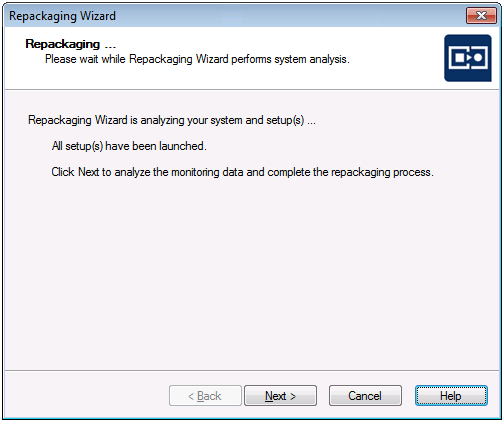
- When you are ready to complete the repackaging process, click Next . The Repackaging Wizard then analyzes the system and setup data that it collected.
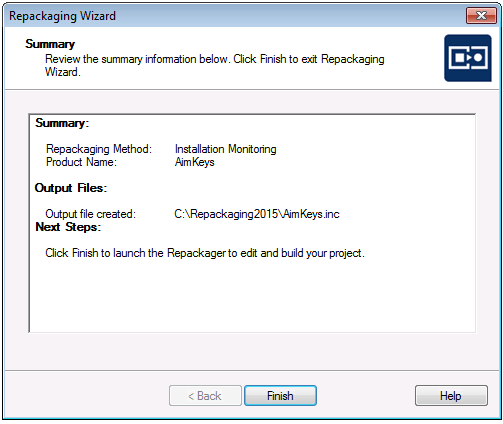
- Following repackaging, the Summary Panel is displayed, providing confirmation that the repackaging was successful.
- Following repackaging, the Summary Panel is displayed, providing confirmation that the repackaging was successful.
- Click Finish . Repackager launches and opens the Repackager project file (
*.irp) that you just created. - Continue with the instructions in Working With Repackager Projects.
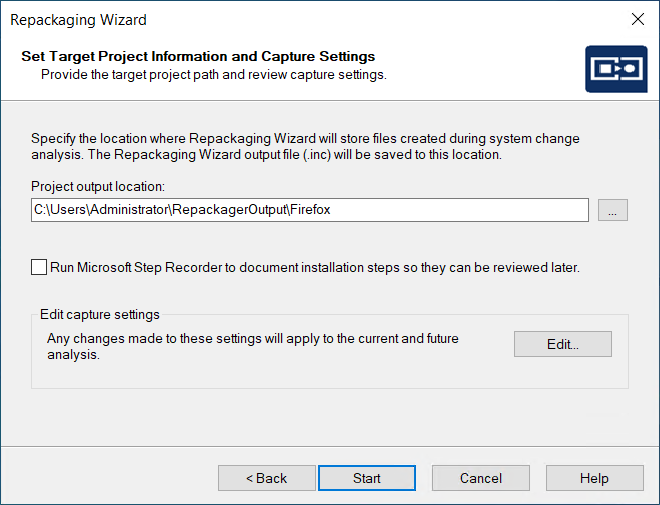
- Click the Browse () button next to the Project path to store files field and select the directory where you want the Repackaging Wizard to place its output, including the Repackager project file (
.irp), the Repackaging Wizard output files, and source files.